


The Azure Storage Account as a Microsoft provided service, allows you to store and manage different types of data in the cloud environment. It is an essential component in Azure for storing and accessing data. It provides clients scalable, secure and highly available storage solutions.
Storage account in Azure supports various types of data including container (blobs or binary), file share, queue and tables.
For you to create other data storage resource e.g. blobs, file share, queue and tables, you will need a storage account. This makes the storage account a fundamental building blocks for creating other storage and allow flexible access to data.
To create a storage account, the pre-requisite is to:
a. Have an active Azure account subscription. Click on this link azure.microsoft.com/en-us/free/open-source
1. Create a Storage Account
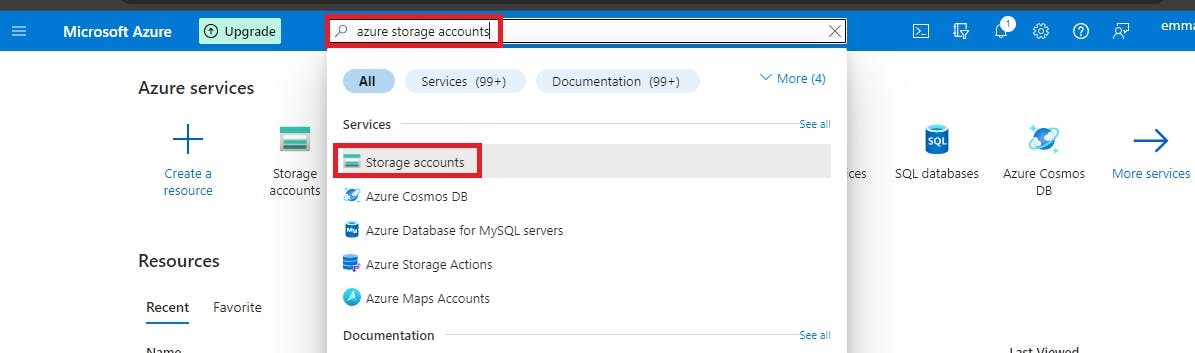
a. Log into your Azure Subscription Account to access the Azure Service portal
b. Type 'Storage Account' in the search bar, and select storage account from the drop down menu.
c
c. Click on 'Create'

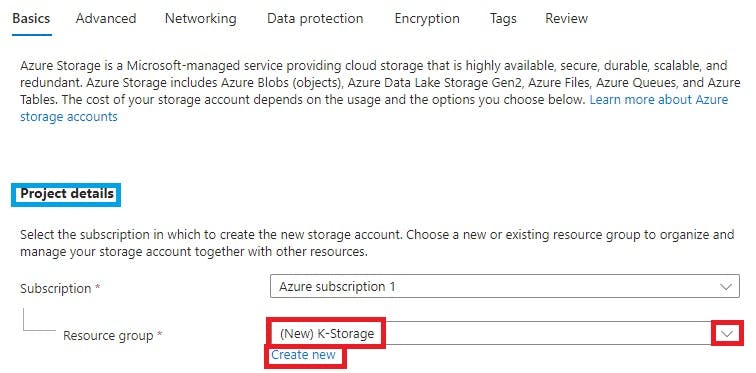
In the Basic section, under Project details
d. Select your Azure subscription
e. Click on 'Create new' to create a resource group or click on the drop down arrow to select from existing resource groups.
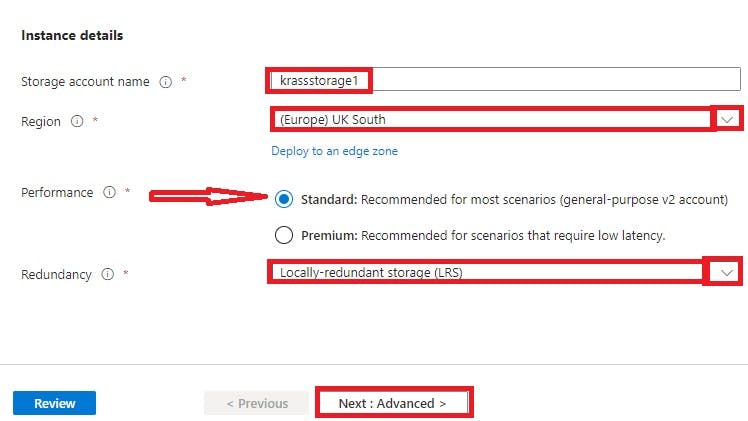
In the 'Instance details' category
f. Give 'Storage account' a name (a name that is unique and globally available - meaning that that name has not been used by anyone in Azure cloud environment. Uppercases are not allow)
g. Select a 'Region' that is near you by clicking the drop down menu
h. Select 'Standard' under performance
i. Choose 'Local Redundancy Storage (LRS)'
j. Click on 'Next: Advanced.
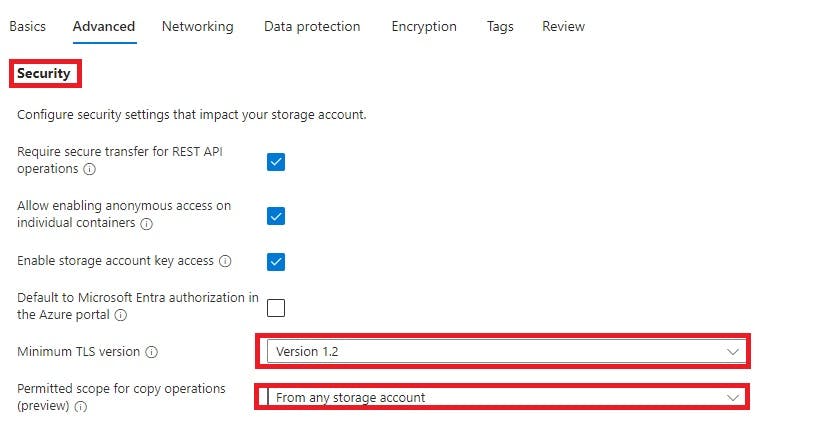
In the Security section
k. Check all the first three boxes and leave the fourth 'Uncheck'
l. Select 'Version 1.2' for minimum TLS version
m. Accept default for permitted scope for copy operations.
Under the Hierarchical Namespace
n. Accept default: Uncheck

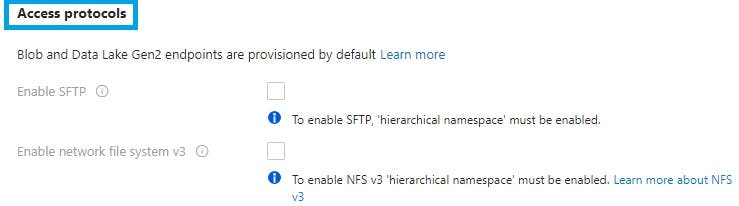
Under 'Access Protocol'
o. Accept all defaults
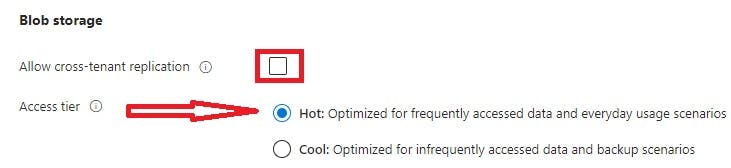
In the blob storage section
p. Select 'Hot'
Although, there are other Access tier like cool as you could see here, cold and archive which are not readily visible but will be available when file share is created. The hot access tier, is optimized for data that is easily accessed and used.
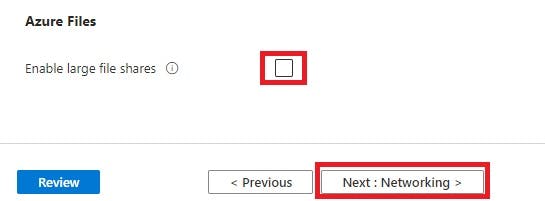
For Azure Files
q. Leave enable large file share at default (Uncheck)
r. Click on 'Next: Networking'
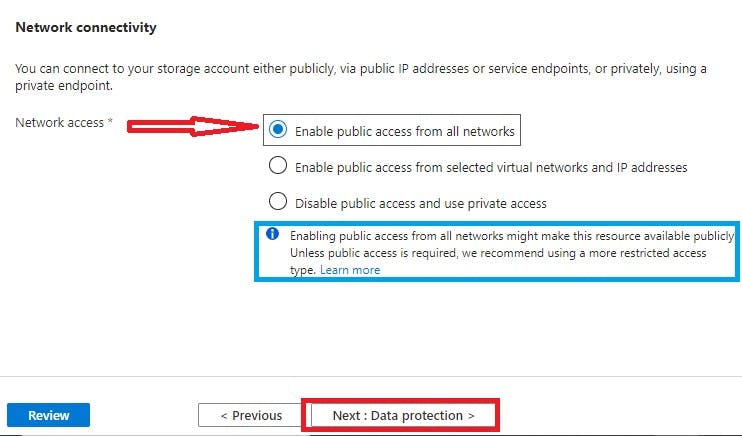
In the network section
s. Accept 'enable public access from all networks' as default.
By allowing public access from all networks, you are granting permission to all clients to access your storage account. Although, this is not a standard recommendation from a security point of view. In the Azure storage account set up however, you are allow to change access level to limit public from accessing your storage account.
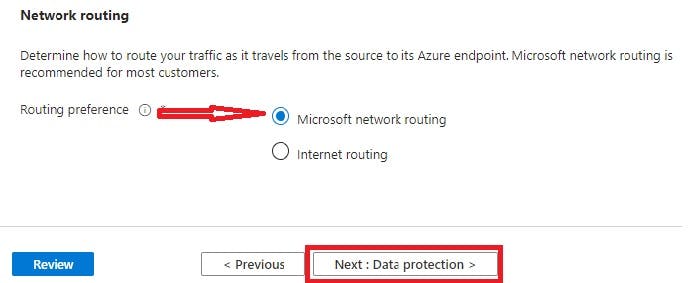
Routing Preference
t. Leave it at default (Microsoft network routing)
u. Click on 'Next: Data protection'
Under 'Recovery, Tracking and Access Control
Accept all defaults and click on Next: Encryption
Under encryption
v. Select Microsoft-managed keys for 'Encryption type
w. Select 'Blobs and files only' for Enable support for customer-managed keys
x. Accept default for 'Enable infrastructure encryption'
Skip 'Tags'
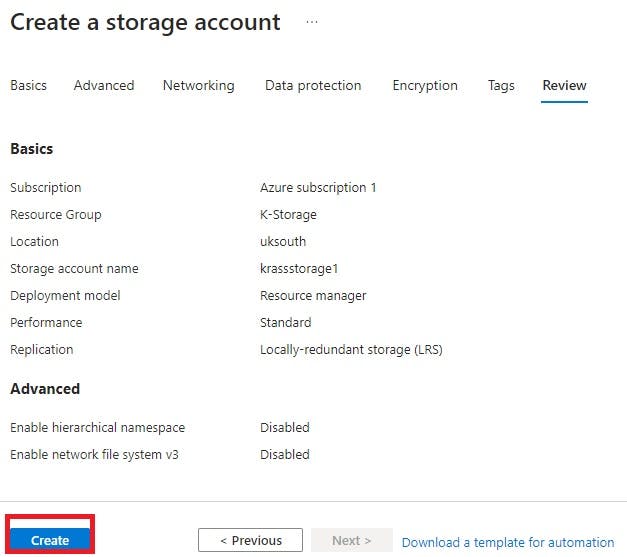
y. Click on 'Review' to run final validation of your storage account configuration

Finally, click 'Create' for the deployment of your storage account.
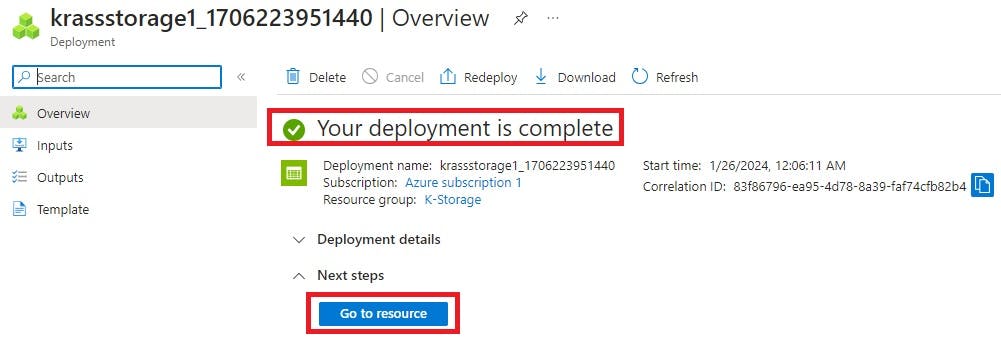
After a successful completion of deployment of storage account
z. Click on 'Go to resource'
Note: Your Azure Storage Account contains resources like 'Container', 'File Share', 'Queue', and 'Tables' that could be found under data storage at the left pane of the storage account page. Hence, without creating your storage account first, you won't be able to create any other data storage resources listed.
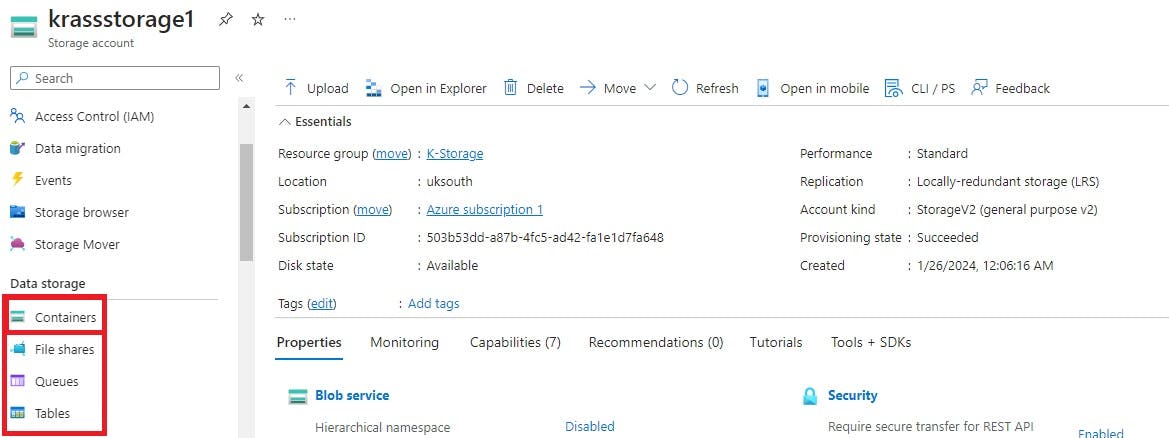
Now that you have created your storage account, you can begin now to create other resource like Container, File share, Queue and Tables by exploring the left pane of the account page under data storage.
Thank you for reading my blog. Hope it suffice as resource for knowledge and tools for project.