


Azure Storage Account offers organizations and individuals many ways of storing their data (either structured or unstructured data); and these can be categorized or grouped into mainly four, namely azure container (blobs), azure file share, azure queues, and azure tables.
Before guiding you through those steps on how to create a blob storage account, which is the subject of text, it's important to conceptualized what blob storage account is.
What is blob storage account?
It is a large storage space in the azure environment that is optimized for storing massive amount of unstructured data such as picture images, document, video etc. These kind of data are called blobs and they are often organized in a large container.
Instead of stacking files in a physical shelf, organization and individuals virtually organized their files in a container called blobs.
In this blog, I will guide you on a step by step journey on How to Create Azure Blob Storage account for your data
The steps are how to:
Create a storage account in Azure. This is fundamental to successfully creating a blob storage.
Create a container for your blob storage
Upload your blobs into the container
Change access level
How to generate a SAS URL
Show you the types of Access tier
Pre-requisite: Having an active Azure subscription is key. So if you do not have an Azure subscription, click on this link https://azure.microsoft.com/free/ account to create one.
Create Storage account.
After you had successfully created an Azure account,
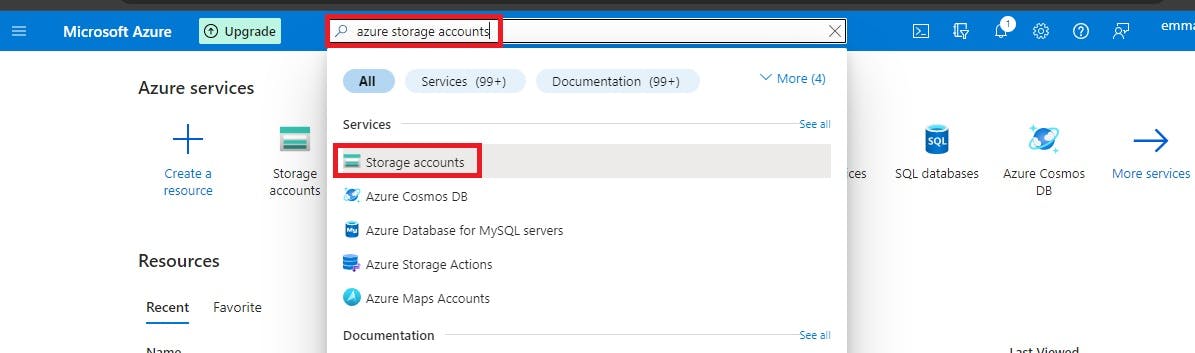
a. log in to the Azure Portal
b. In the search bar, type 'Storage account', and click on Storage Account
On the storage account page,
c. Click on 'Create'

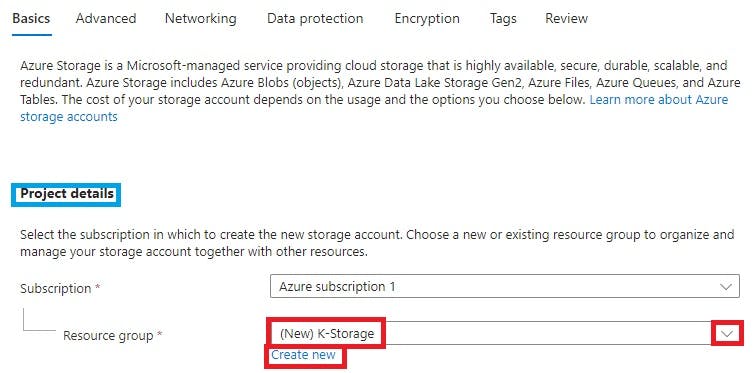
In the Basic section, under Project details
d. Select an Azure Subscription
e. Click on 'create new' to create a new resource group or click on the drop down arrow to select from an existing resource group
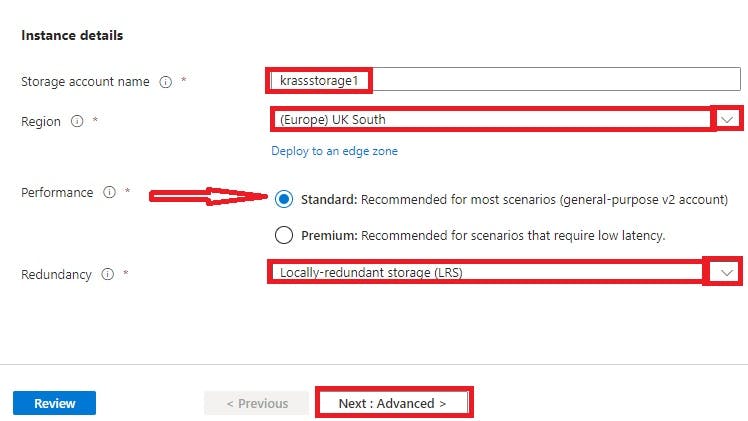
In the Instance detail category
f. Give your 'storage account' a name (a name which must be unique and globally available, and must not contain UPPERCASE text, but lowercase and numbers).
g. Select a Region by clicking on the drop down arrow
h. Select 'Standard' for performance
i. For Redundancy, select locally redundant storage. Recommended for non critical scenario.
j. Click on Next: Advanced
Security
k. Tick the first three boxes and leave the fourth unchecked
l. Select 1.2 version. Leave the last item on default
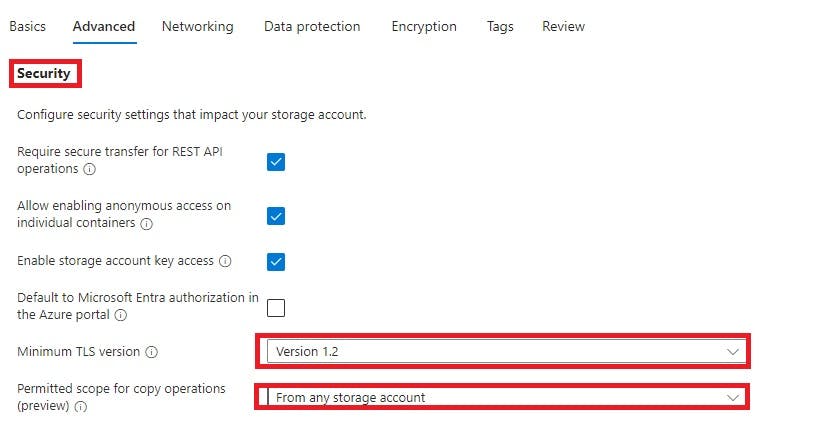
Leave all other items on default and scroll down to Blob storage.
Access tier
m. Select HOT for a data that you want to frequently view and access. At the point of creating your Azure account storage, it is only Hot and Cool that are available. However, there is another access tier called Archive. You can only view this after the storage is created.
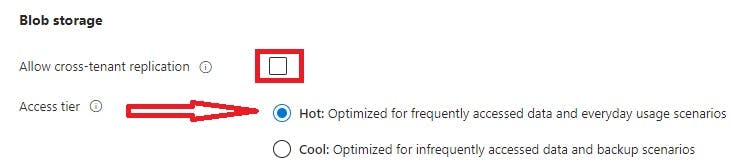
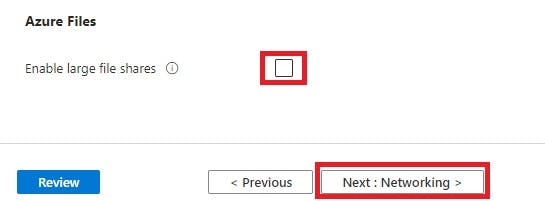
Allow default for Azure files and then click on Next: Networking
Under Networking is 'Network connectivity.
n. Enable public access from all network. This action grants the public access to your storage.

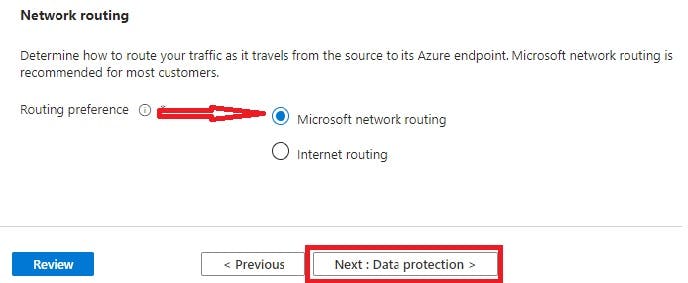
Network routing:
o. Leave at default routing preference 'Microsoft network routing'
p. Click on 'Next: Data protection' to proceed.
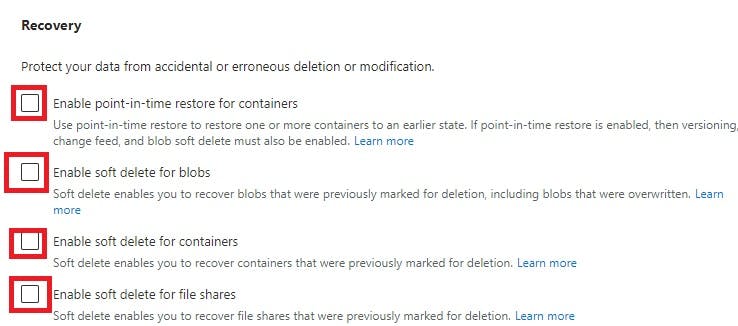
On the data protection page, is recovery,
q. Leave all values uncheck
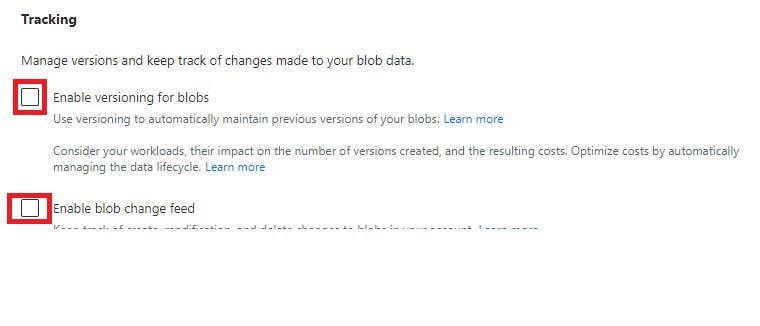
Tracking:
r. Leave all values at its default state.
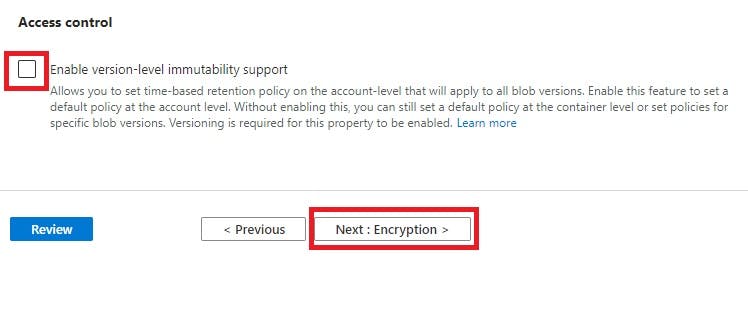
Access Control
s. Allow default (Unchecked)
t. Click on Next: Encryption
Encryption type:
u. Select 'Microsoft Managed Key (MMK)
w. Select 'Blobs and Files only as indicated by the arrow.
Allow enable infrastructure encryption at default.
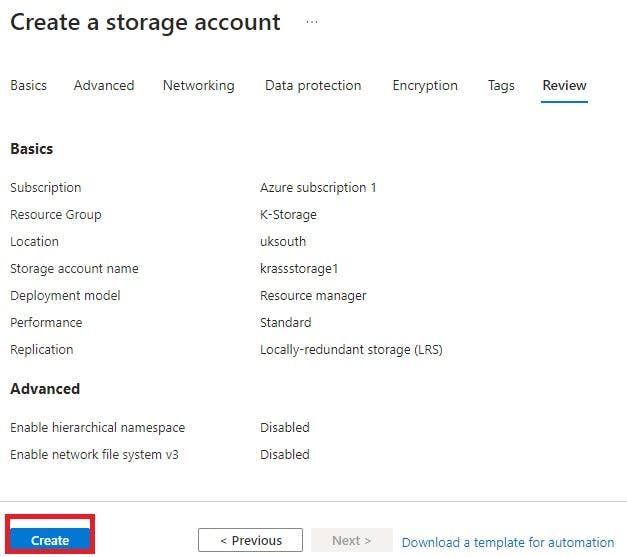
x. Click on 'review'

When you click on review, wait and allow the system to run a validation check on your storage configuration. When validation is passed
y. Click on 'create' for deployment of resource.
When you click on the create button your resource will be deployed. Wait for your deployment to be completed
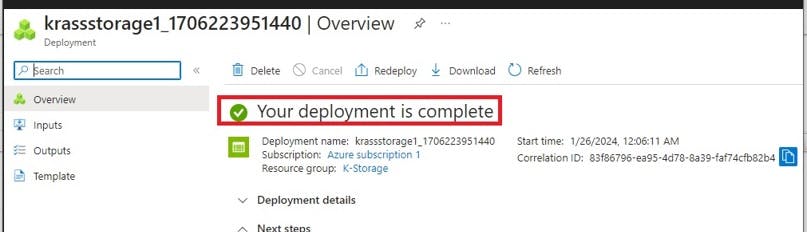
z. Select 'Go to resource'

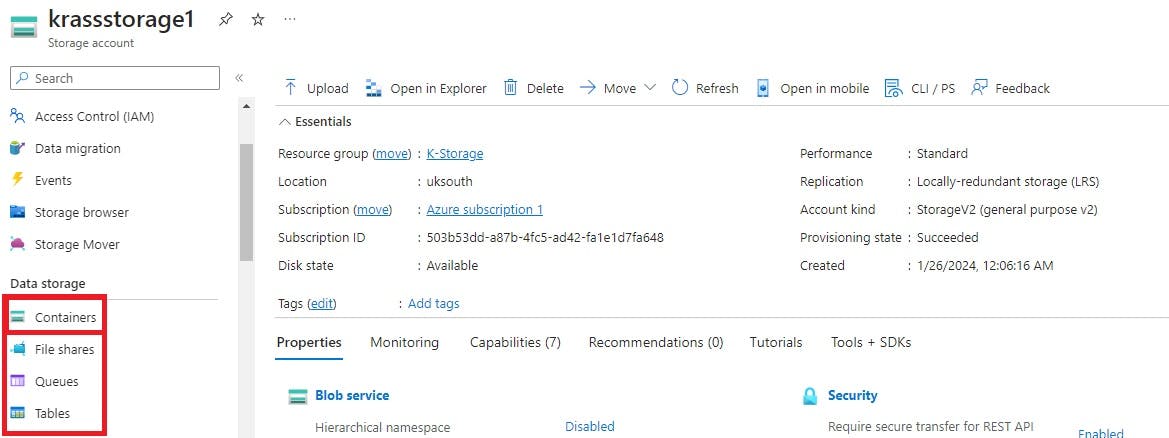
Finally, click on Overview to view the storage account. On the left pane of the storage account are resources like Containers, Files, Queues and Tables
Now that a new Storage account is created, let us create a container
How to Create a Container for Blobs Storage
a. To create a container for your blobs, scroll down on the page to the left pane under data storage and 'Select Container'. Then click on +Container at the top of the page

b. This will direct you to a page.
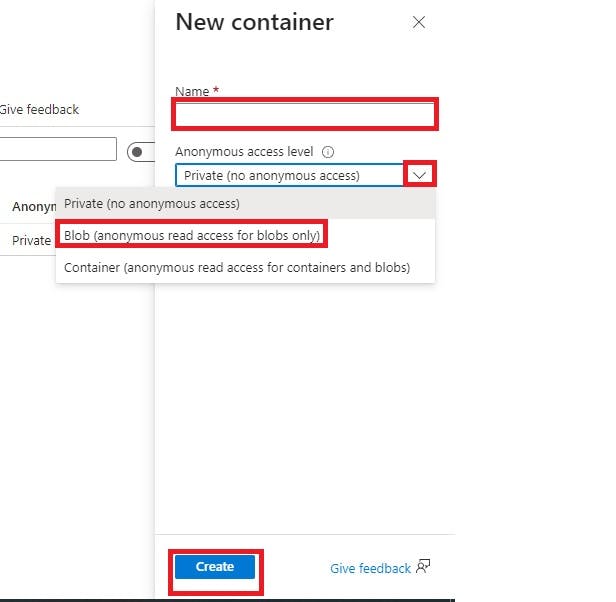
c. Give your Container a name.
d. Click on the drop down arrow under anonymous access level and select Blobs (anonymous read access only). By doing that, the public will be able to access your image data, videos, documents over the internet.
e. Then, click on 'Create'
How to Upload Blobs to Container
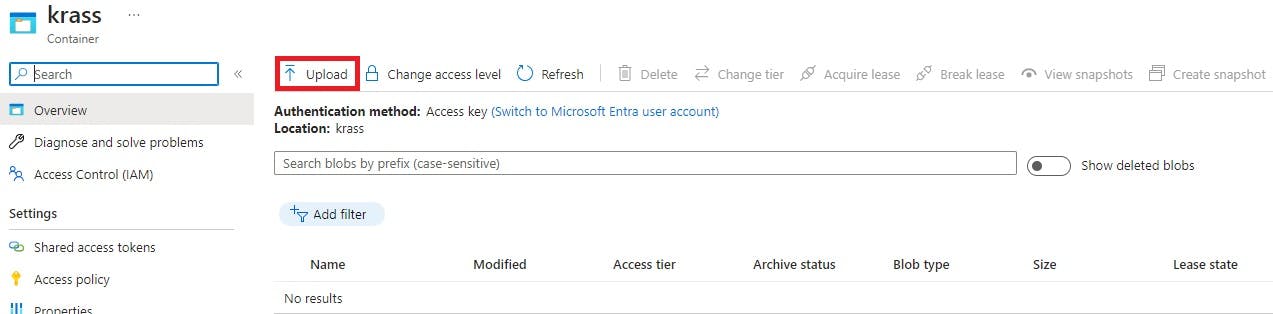
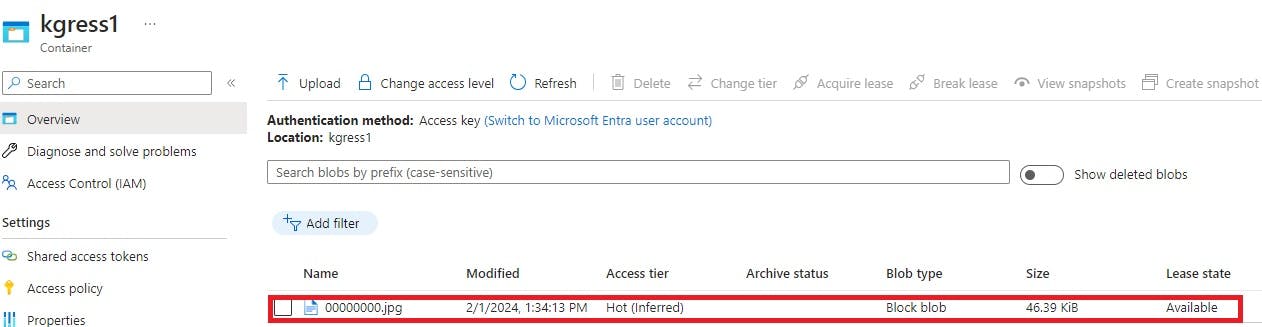
a. Click on the newly created container to open
b. Click on 'Upload' to upload your blobs. (Remember, blobs are pictures, videos, screenshot images, documents. Any unstructured data).
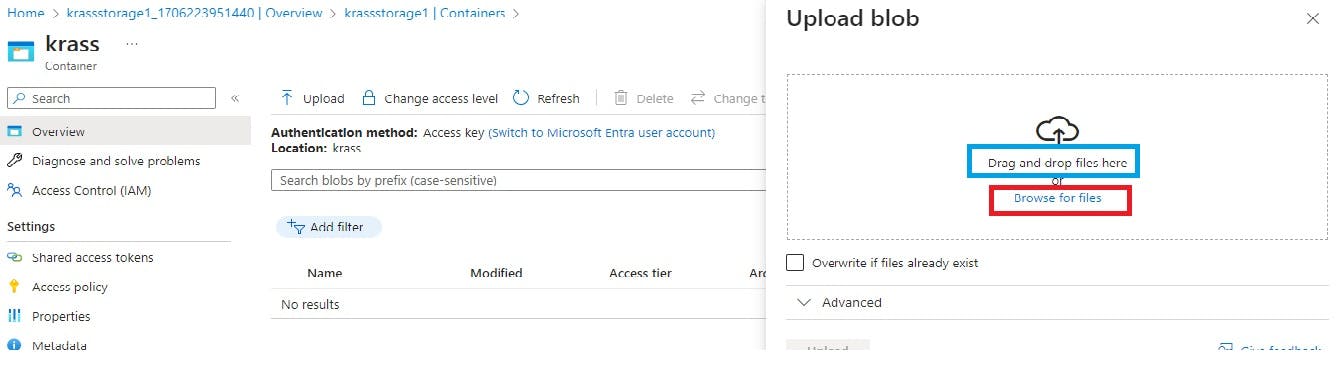
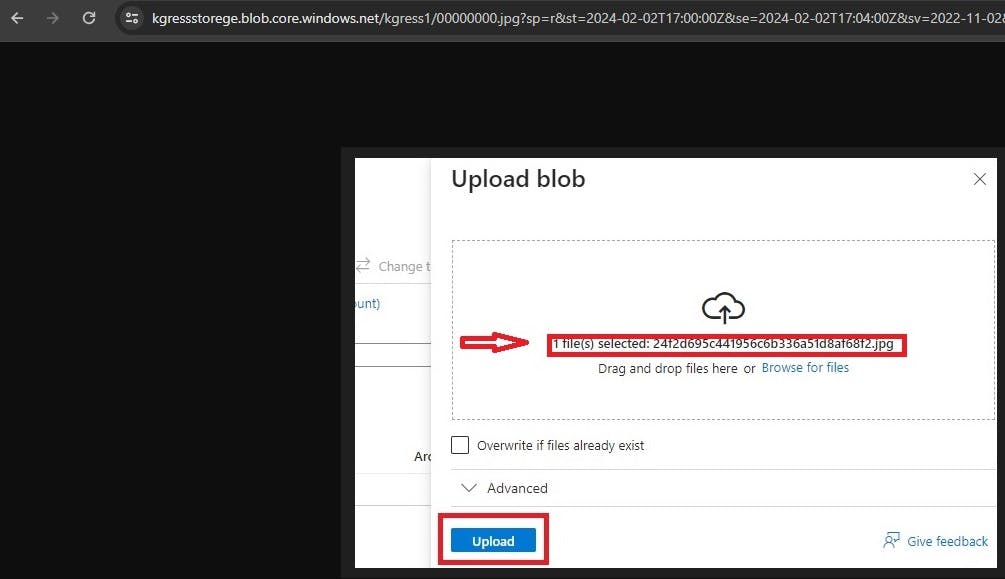
c. Click on 'Browse for files or 'Drag and drop here. This refers to your pictures files and video in the file folder of your Laptop/Pc
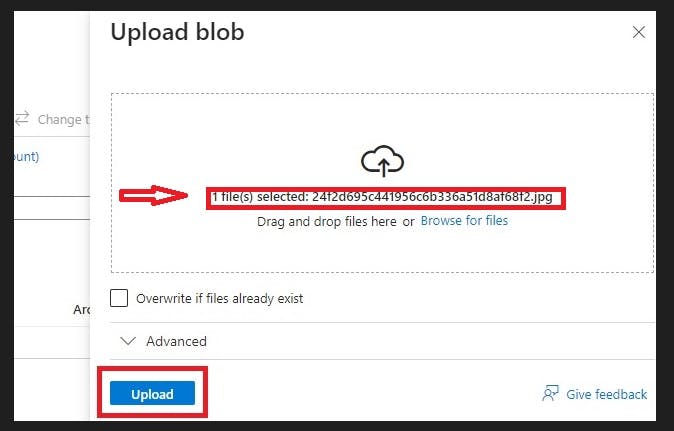
d. Follow the arrow and you could see that a file has been uploaded, then click on upload
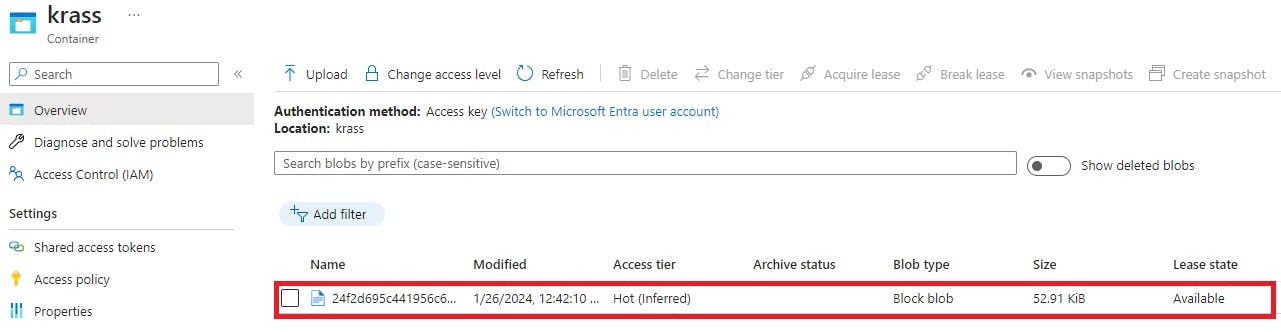
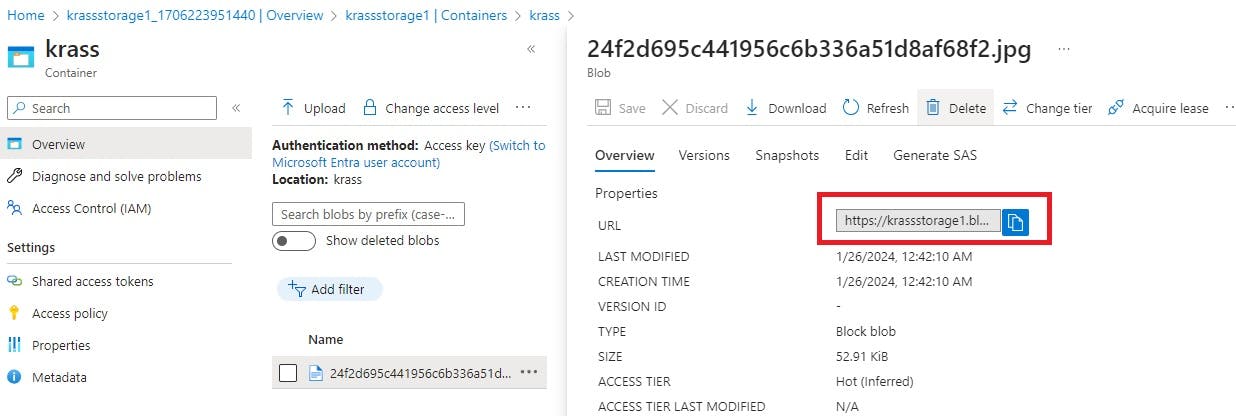
e. To view blob (image or picture), Click on the uploaded blob file
f. Copy the blob URL
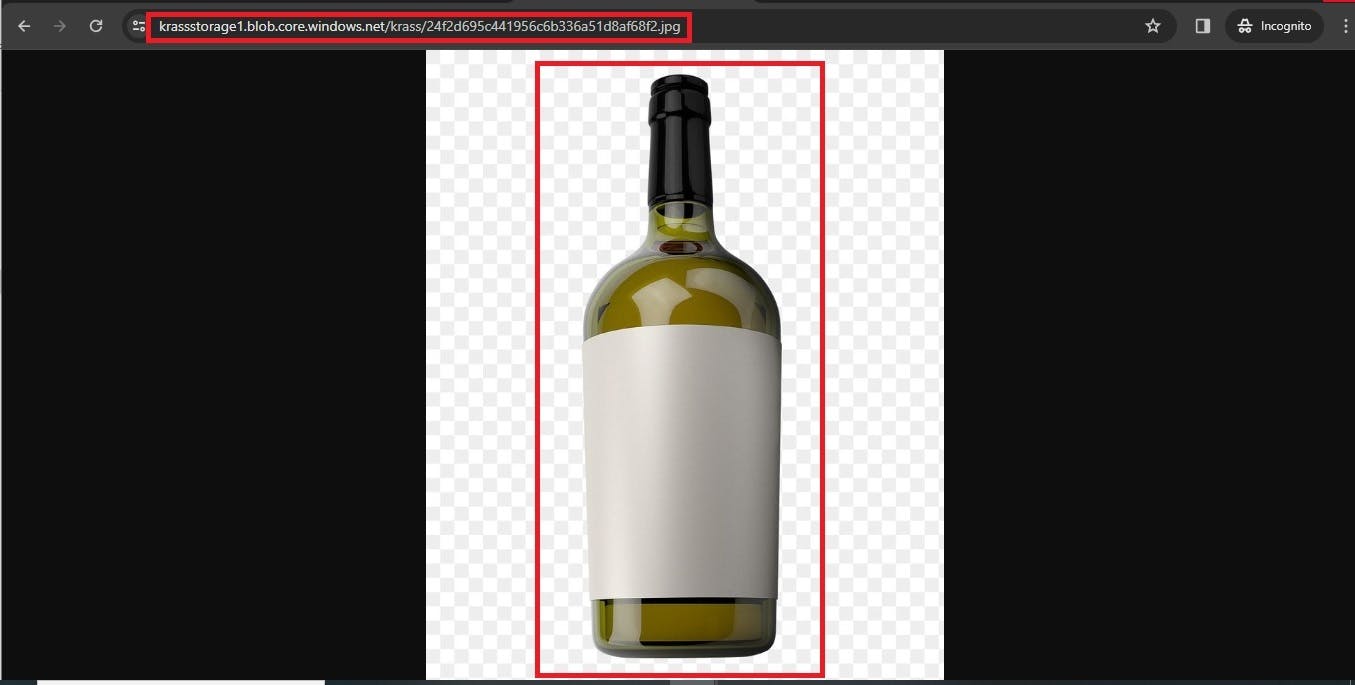
g. Navigate to your browser, paste the URL and press the 'Enter' button on your PC or Laptop.
How to Change Access Level
There are three types of Access Level in storage account resource in Azure.
i. Private (no anonymous access) i.e. access to blob data and container is completely limited to public over the internet. This option is always set at default for all new containers.
ii. Blob (anonymous read access for blobs only) i.e. at this access level, you allow the public to read blobs - images, stream videos and document that are within the container. They cannot access container data anonymously.
iii. Container (anonymous read access for containers and blobs). At this level, container and blob data can be read (viewed) by anonymous request. Without you granting the public permission they can access your blob data.
It is recommended that you keep your storage account private - no anonymous access- for optimal security.
How do you change anonymous access level to blobs and container in your Storage account?
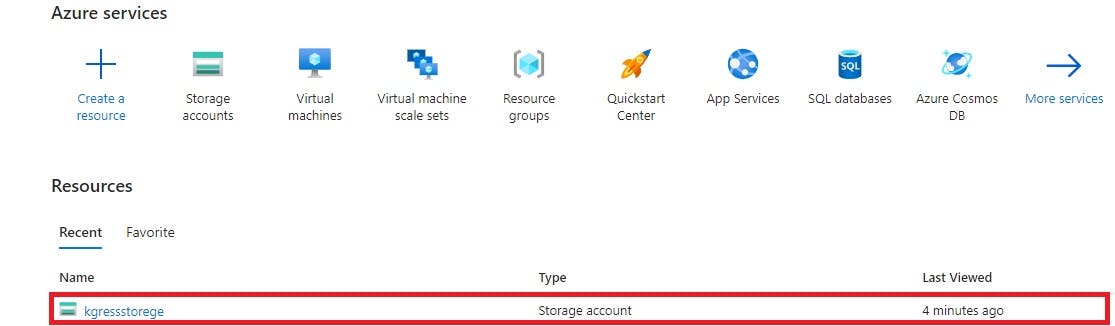
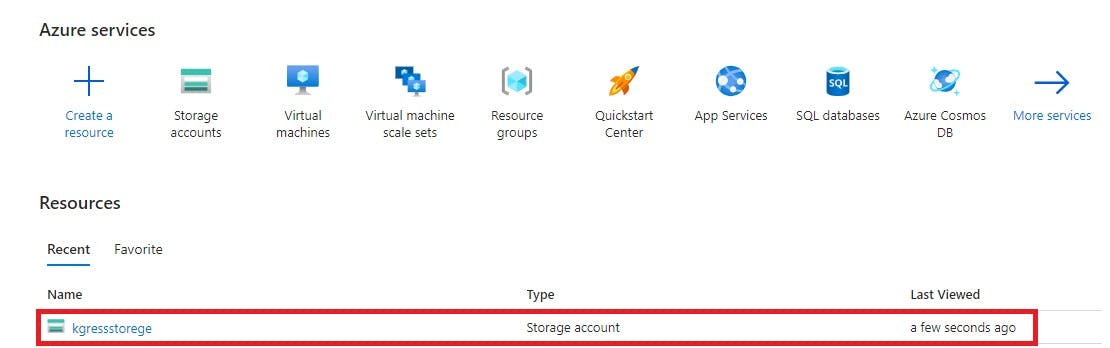
a. Open storage account in the Azure services Home page
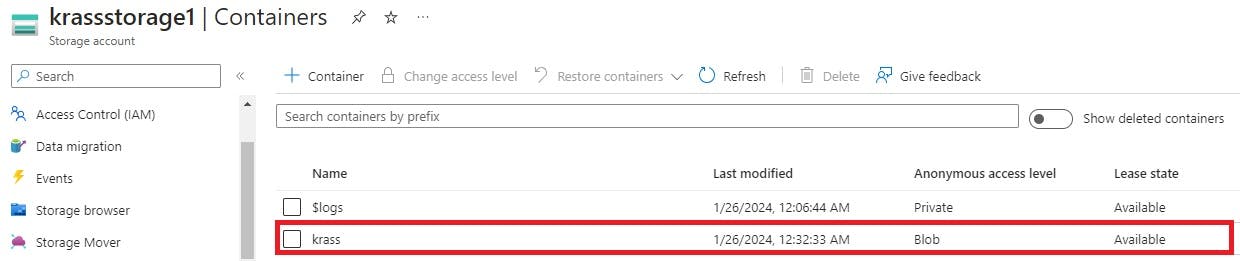
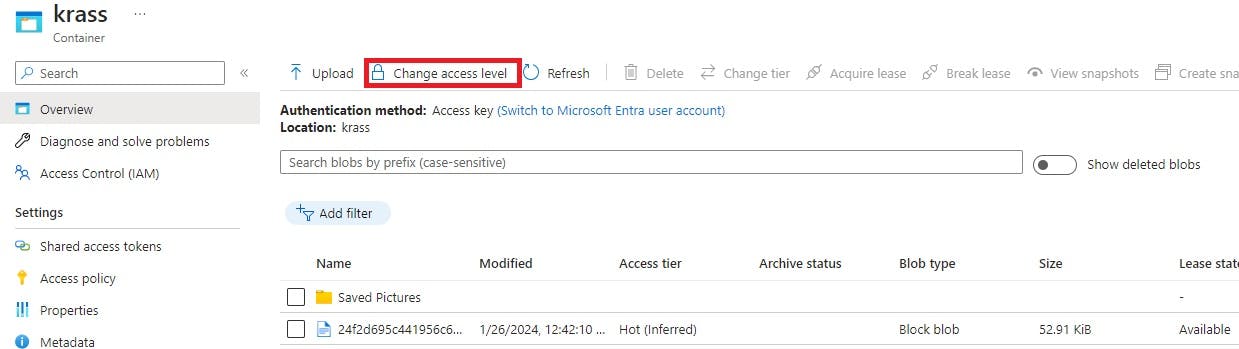
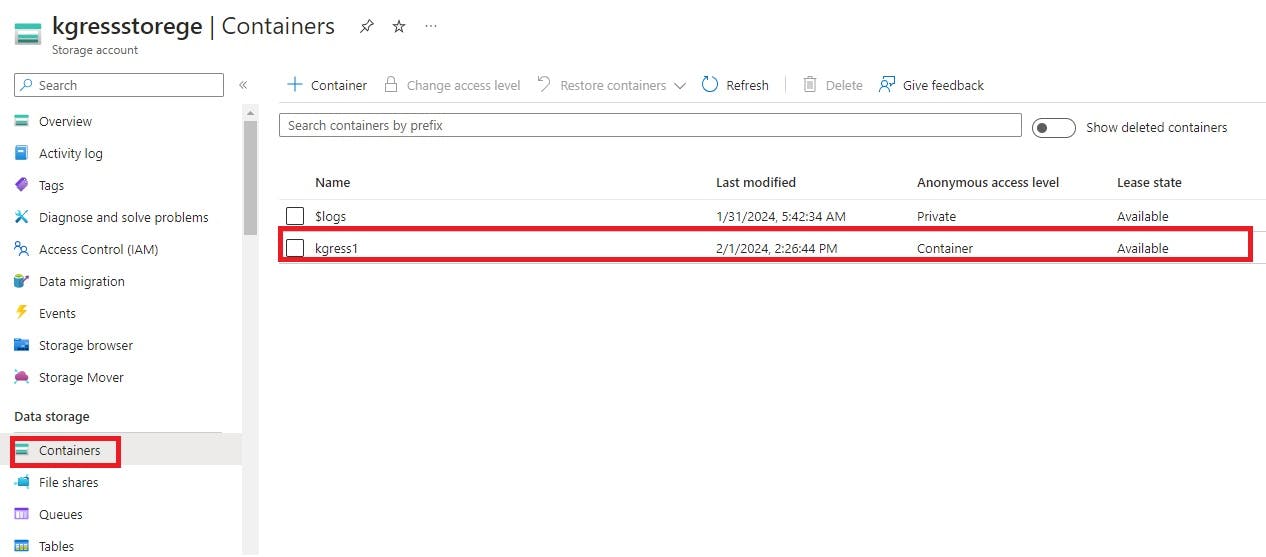
b. Click on container (A) under data storage on the left pane
c. Select the container for which you want to set the anonymous access (B)

d. Click 'change access level'
e. Click on the drop down arrow to select from the available access level

f. Click 'OK'
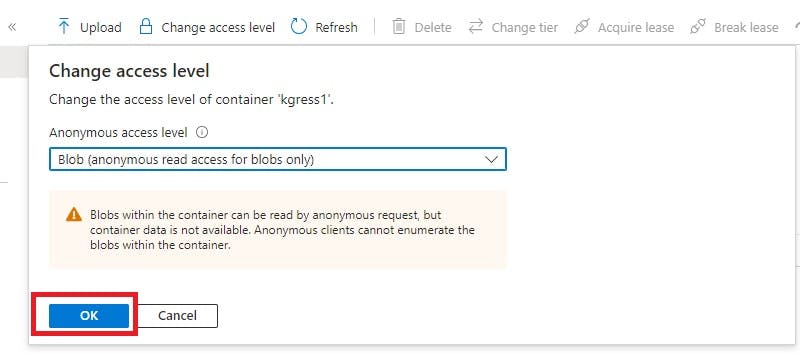
It is recommended that anonymous access level is set at private (no anonymous access to optimized security of container.
How to Generate SAS URL
Shared Access Signature (SAS) is a URL generated to grant access to restricted blobs or storage containers within a set time.
When you set anonymous access level as private (no anonymous access) on a storage container, you have restricted public access over the internet to that container and blobs. However, you can grant permission to view container and blobs within a specific time limit without sharing your storage account key - this is by generating a SAS URL.
Hence, to generate SAS, follow these steps
a. Click storage account on the Azure resource place
b. Click on container under data storage at the left pane of storage account page.
c. Click on blob container
d. Click on the (blob data)
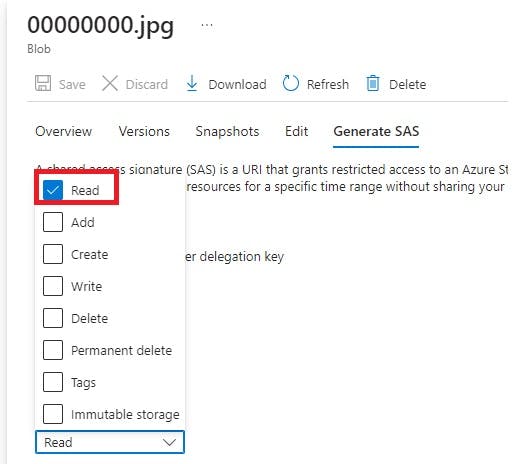
e. Click on Generate SAS

f. Leave the permission on 'Read'
NOTE: Before setting the time within which permission would be granted to access blob data, click on generate SAS and copy the URL and paste in your browser. The result would be an encrypted data

To grant access to blobs
g. Set 'Start and expiry date & time
h. Select HTTPS & HTTP (this is an Internet protocol that gives public access to your blob container within the set time.

i. Click on 'Generate SAS Token & URL
j. Copy the Blob SAS URL

k. Navigate to your browser and paste the copied url. This was the encrypted blob in our SAS URL
Remember, that permission was granted for only 4 minutes after which, access would be denied. Go back to the 'Generate SAS page, refresh it, and copy Blob SAS URL. Paste it on your browser to view an entirely encrypted image, because access to the blob data has been DENIED

How to Change between Access TIER
Data stored in Azure storage are organized based on how frequently they can be accessed, modified and retained. This is because it comes with a cost. The less frequently a data is accessed the lower the cost of storage.
There are four (4) categories of access tier in Azure storage
a. Hot: this is usually the default tier at the storage account setting. It is optimized for data that is frequently accessed or modified.
b. Cool: this is another access tier in Azure storage. Compared to the Hot tier, it is optimized for data that is infrequently accessed or modified with a minimum of 30days storage period. The reason is to avoid early deletion charges.
c. Cold: Data are rarely accessed or modified in this tier category hence, the minimum storage period is 90 days. Any data deleted before the 90 days period is subject to early deletion cost.
d. Archive: is an online tier optimized for storing data that are rarely accessed. Data in this tier must be stored for a minimum period of 180 days.
Steps to changing between access tiers
i. Navigate to blob data page
ii. Click on blob (image uploaded)
iii. Select 'Change tier'
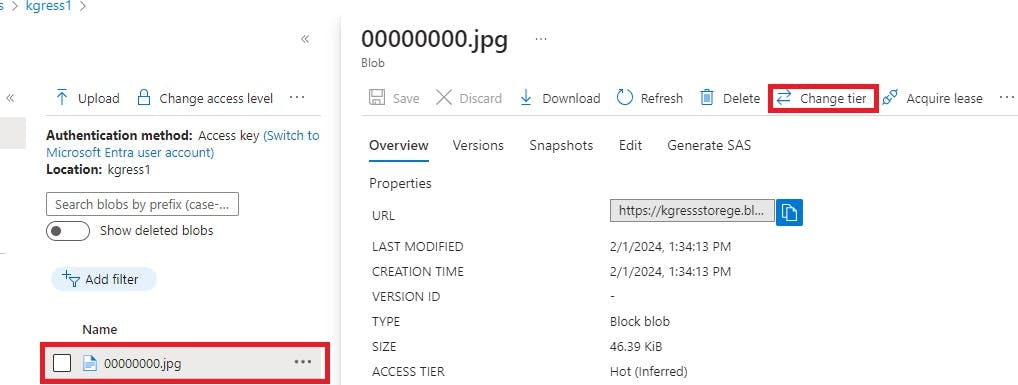
By storage account configuration, it is on Hot (inferred). With this access tier, data can be frequently accessed and modified.

iv. Click on drop down menu to select from the options
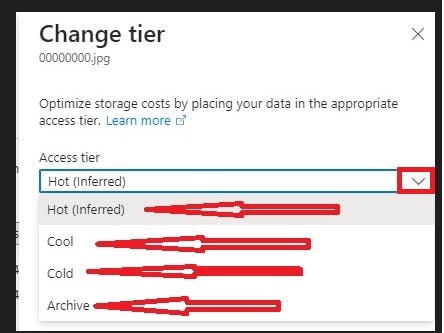
v. I select 'Cool'
vi. Click 'save'
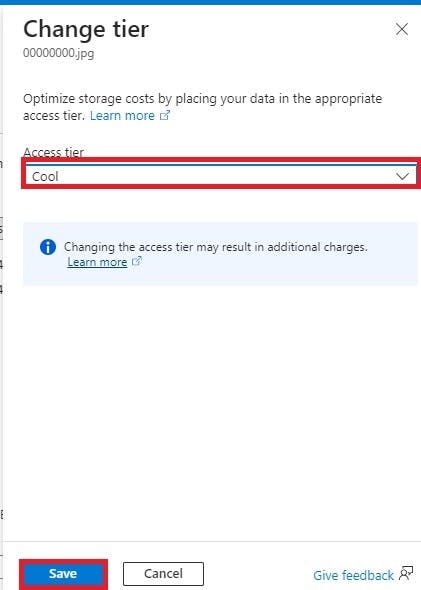
By choosing Cool tier, I am simply saying that, this blob data is infrequently accessed. By implication, it will remain stored for a minimum of 30 days and that any attempt to delete or move it to another tier before the 30 days elapses, is a violation of policy, which attract penalty for early deletion of data.